GLAZING
INSTRUCTIONS
PURE TECHNOLOGY 3

PURE TECHNOLOGY

PURE TECHNOLOGY 3


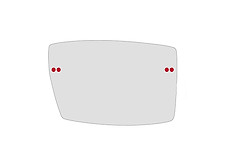
2 holes
VERY IMPORTANT:
1) 1,0 mm drill
2) 1,5 mm ball-head drill
3) 60° countersink
4) Special FLAIR Nylon
6) 1,8 mm minimal edge thickness

1,8 mm minimal edge thickness
Drill
Step 1
CNC: Use 1.0 mm drill.
Less Stress: Use 1.0 mm drill. FLAIR art. 60038
By hand: Use the „pure“ drilling jig. FLAIR art. 60057.
Drill the two outer holes with the 0.9 mm drill.
FLAIR art. 60020.

∅ 1,5 mm ball-head drill
(FLAIR Art. 60021)
Step 2
Drill the outer drill hole on the inside so deeply, that the ball head is flush.

60° countersink (FLAIR Art. 60035)
Step 3
Deburr all drill holes with the 60° countersink.
Use the countersink in order to nasally sink the inner drill hole B somewhat more than the other holes, to ensure a perfect fit of the nosebridge.

∅ 0,4 mm FLAIR Nylon
(FLAIR Art. 326029)
Step 4
Double the nylon thread and guide it through the drill hole A from the inside. Turn the loop inwards and fix it with your finger on the lens.

Step 5
Lead back the threads through the same hole.

Step 6
For further assembly, it is advisable to turn the threads by 180 degrees, so that the loop is on the outside.

Step 7
Insert the edge/bridge. Tighten each thread individually with the pliers.

Step 8
Knot with simple knots. Tighten. The knots disappear in the countersink.

Pliers for nylon threads or
„pure“ precision pliers
Step 9
Cut off excess threads.

Step 10
The desired result.
PURE TECHNOLOGY


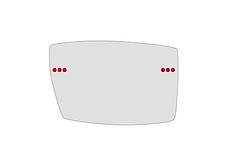
3 holes
VERY IMPORTANT:
1) 0,9 mm drill
2) 1,4 mm ball-head drill
3) 60° countersink
4) Special FLAIR Nylon
5) All holes 0.9 mm. Never bigger!
6) 1,8 mm minimal edge thickness

DRILL
Step 1
Use 0.8 mm drill to create 0.9 mm hole. Drill available from the machine supplier.
Less Stress: Use 0.9 mm drill. FLAIR art. 60037
By hand: Use 0.9 mm drill. FLAIR art. 60020
Use the „pure“ drilling jig. FLAIR art. 60057
1,8 mm minimal edge thickness

∅ 1,4 mm ball-head drill
(FLAIR Art. 60021)
Step 2
Drill the middle hole on the inside so deeply, that the ball head is flush.
∅ 0,4 mm FLAIR Nylon
(FLAIR Art. 326029)

60° countersink
(FLAIR Art. 60035)
Step 3
Deburr all drill holes with the 60° countersink.

Step 4
Guide the doubled thread from the inside through hole A and crossed back through hole B.

Step 5
Insert the edge/bridge. Tighten each thread individually with the pliers.

Before knotting push the lateral thread on the edge/bridge very close to the glass edge!
Step 6
Knot with simple knots.

Step 7
Tighten. The knot disappears in the countersink.

Pliers for nylon threads or
„pure“ precision pliers
Step 8
Cut off excess threads.

Step 9
The desired result.
FLAIR on Instagram
Home


